.
Turn anything into a 3D model
Scan-to-Metaverse, sponsored by OPPO Electronics.

Role
HCD Coordinator
Role
HCD Coordinator
Industry
Technology, Software
Industry
Technology, Software
Duration
6 months
Duration
6 months
What am I addressing?
OPPO Electronics wants to produce 3D object scanners that are more cost-efficient and user friendly.
With a team of 4 hardware and software engineers, I led the project as Human-Centered Design Coordinator.
What am I addressing?
OPPO Electronics wants to produce 3D object scanners that are more cost-efficient and user friendly.
With a team of 4 hardware and software engineers, I led the project as Human-Centered Design Coordinator.
Once we aligned with stakeholders on the project scope, I conducted in-depth research to gain a deep understanding of the user experience.
Once we aligned with stakeholders on the project scope, I conducted in-depth research to gain a deep understanding of the user experience.
Users
Niche users consisted of Architects and Industrial Designers.
These users use 3D object scanners to quickly convert their physical prototypes into digital files for fast delivery to clients.
Users
Niche users consisted of Architects and Industrial Designers.
These users use 3D object scanners to quickly convert their physical prototypes into digital files for fast delivery to clients.
Research
Secondary research and user interviews provided insight on where existing designs failed to meet usability expectations.
Questions focused on ergonomic concerns and general challenges faced when using 3D object scanning systems.
Research
Secondary research and user interviews provided insight on where existing designs failed to meet usability expectations.
Questions focused on ergonomic concerns and general challenges faced when using 3D object scanning systems.
Key findings included…
"Flexible positioning options would be helpful for capturing objects."
"Calibration and alignment issues, especially when there is low contrast between the object and the background."
Key findings included…
"Flexible positioning options would be helpful for capturing objects."
"Calibration and alignment issues, especially when there is low contrast between the object and the background."
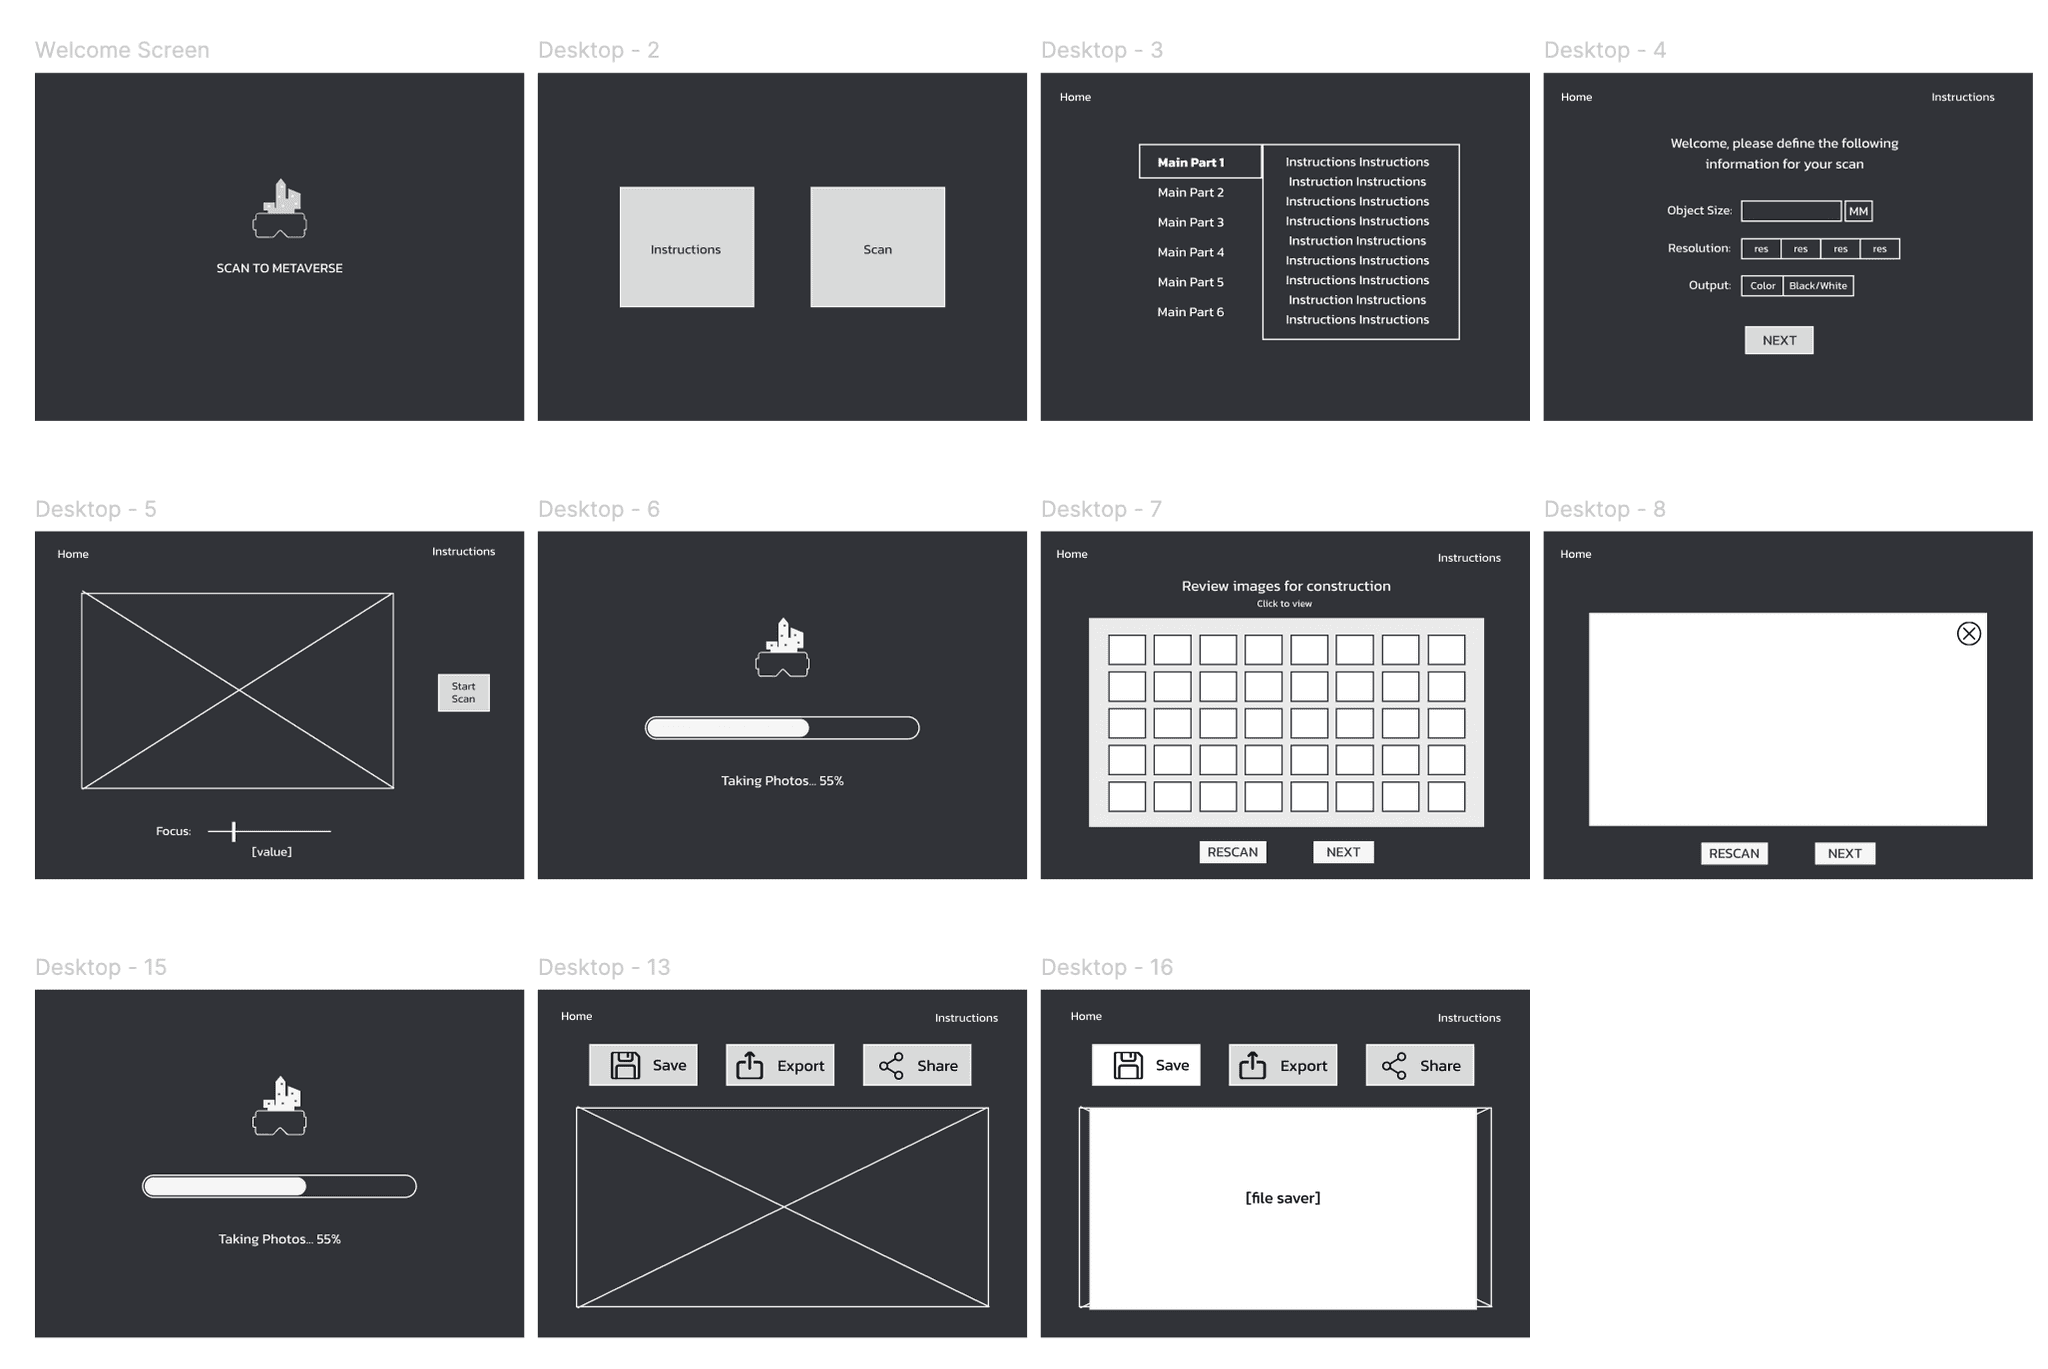
User Flow
To ensure of an intuitive user experience, I created user flows for physical and software elements.
User Flow
To ensure of an intuitive user experience, I created user flows for physical and software elements.


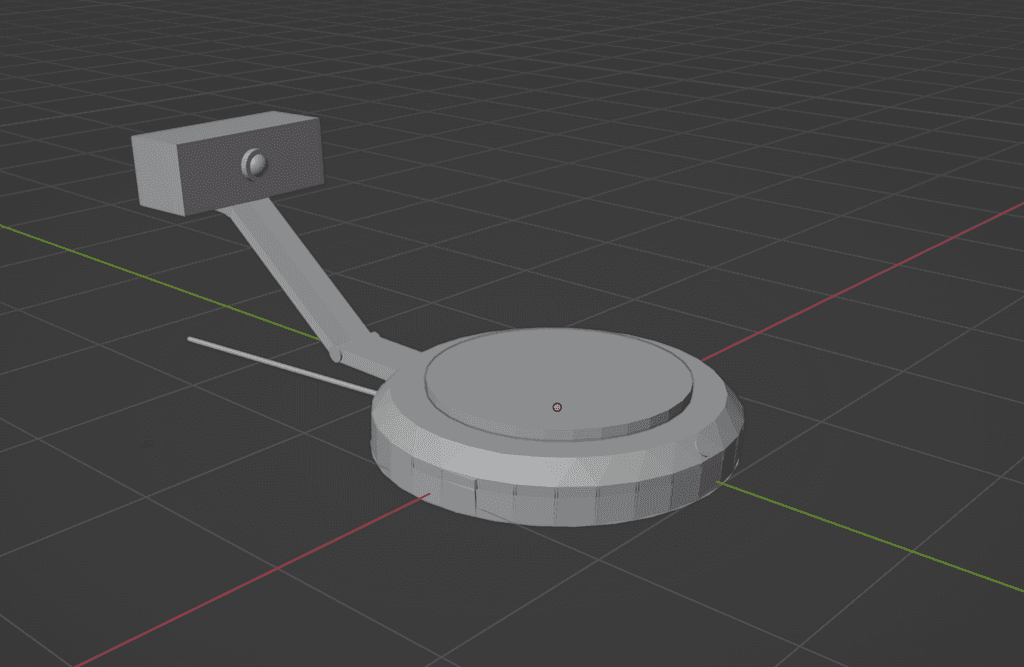
Prototyping
Adjustable camera alignment and distance.
I created 3D models prototypes in Blender, while keeping in mind of user challenges with configurability.
Prototyping
Adjustable camera alignment and distance.
I created 3D models prototypes in Blender, while keeping in mind of user challenges with configurability.
To complete the 3D object scanning system, I developed a Graphical User Interface.
To complete the 3D object scanning system, I developed a Graphical User Interface.
Following 3D printing and assembly, our hardware engineers integrated a motor and Raspberry Pi camera.
Following 3D printing and assembly, our hardware engineers integrated a motor and Raspberry Pi camera.
Final Touches
Interchangeable boxes were built for higher contrast backgrounds.
We finalized the product by integrating minor components, ensuring everything was functional, and getting it fully operational for use.
Final Touches
Interchangeable boxes were built for higher contrast backgrounds.
We finalized the product by integrating minor components, ensuring everything was functional, and getting it fully operational for use.

Findings & Deliverables
Error reduction & functionality validation.
By incorporating contrasting backgrounds and point-cloud data plotting software, we significantly reduced user errors related to object misalignment and inaccurate scanning, leading to a smoother and more reliable user experience. We successfully validated all key features, confirming they met the initial requirements and solving the problems outlined during research.
Final presentations were carried out to the Bellevue OPPO Electronics team in-person.